How To Make The Perfect Christmas Cookie Box

My new favorite tradition is creating cookie boxes filled with all of our family’s favorite holiday treats! Every year, I want to make a ton of different types of Christmas cookies but worry that they will go to waste...or worse, I’ll eat them all! Especially this year, because we can’t gather with big groups of friends and family. So I decided, what better idea than to make every kind of holiday treat that I want, fill boxes with an assortment of cookies, and drop them off at the doorsteps of friends and family members? By doing this, I can still enjoy holiday baking and show the people I love that I’m thinking about them. Sort of like saying hey, I wish we were spending the holidays together, but instead we can both eat these cookies and pretend as if we are.

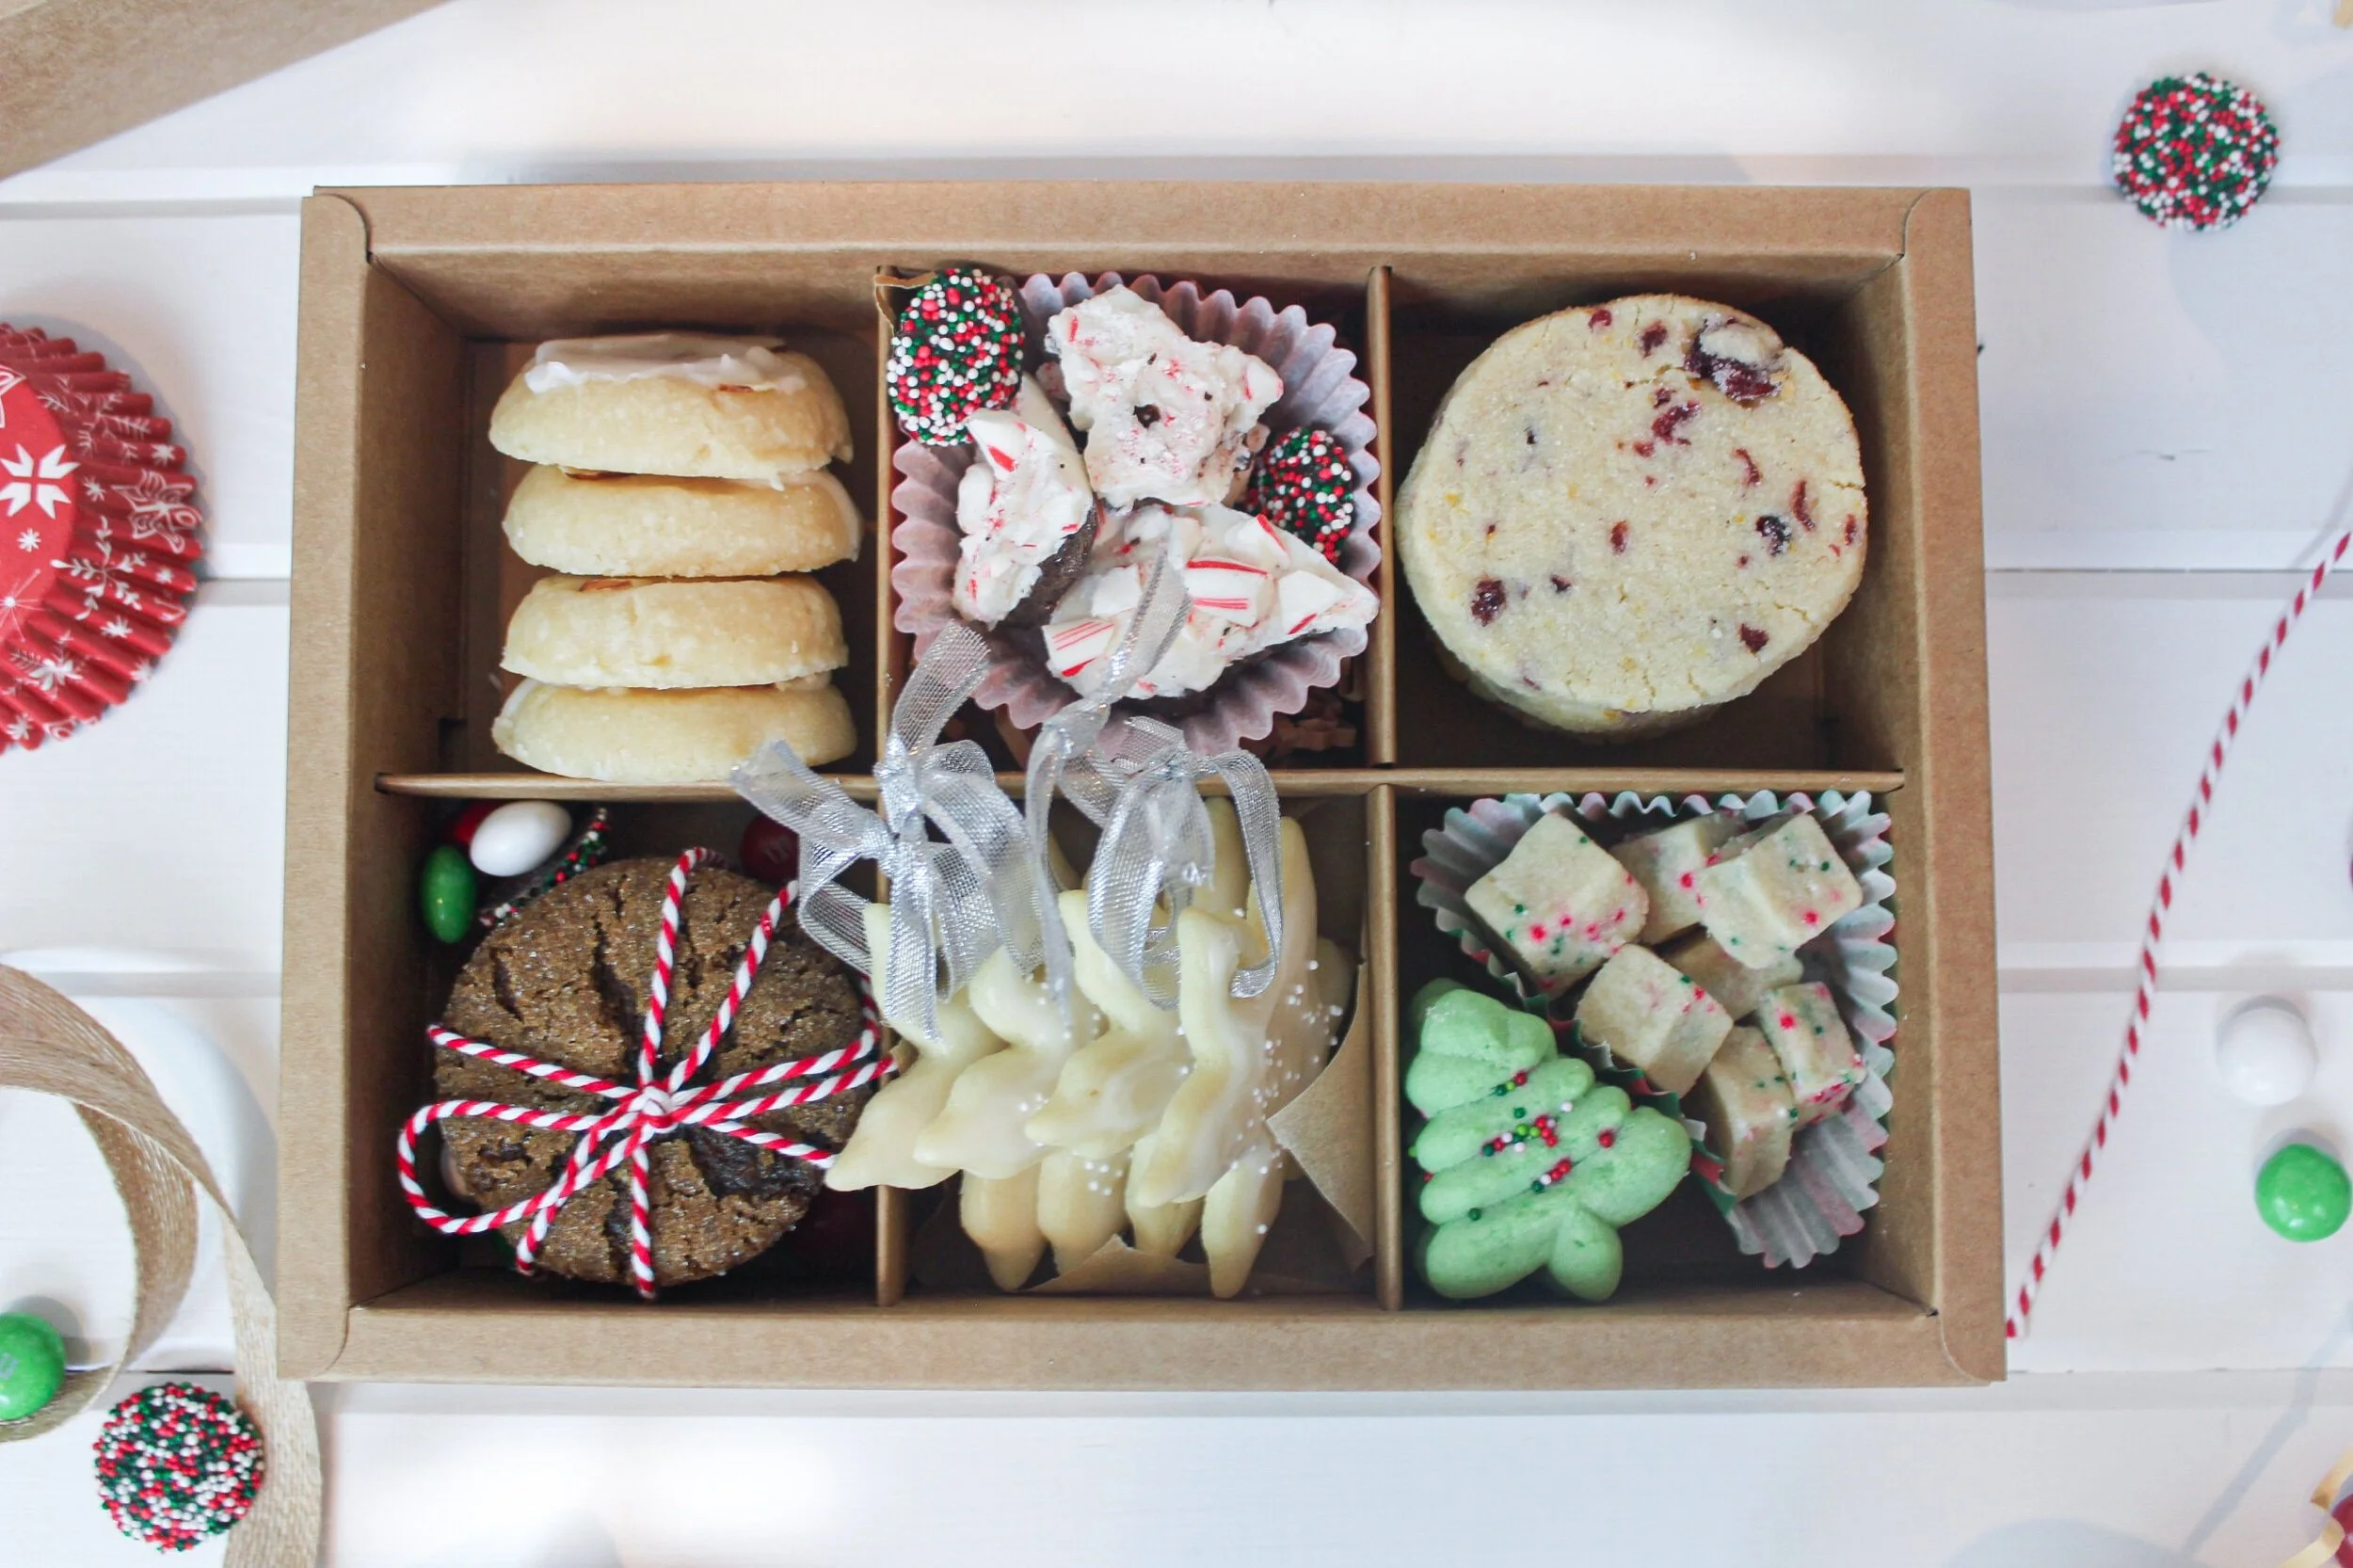


Decide what cookies you’ll include
This is a really important step to plan out because if you don’t, you may have cookies that are too big or too fragile and end up breaking. To get the best result, choose cookies that are thin, will hold their shape, and will fit into the box you’re going to use. Some good examples would be drop cookies, rolled sugar cookies, barks, individually wrapped sweets, fudge, and more. Here are the cookies I chose to use, along with their recipes linked.
Almond Cookies
Funfetti Shortbread Bites
Chewy Ginger Molasses Cookies
Homemade Peppermint Bark
Winter Spiced Wreath Cookies
Cranberry Orange Shortbread Cookies
Linzer Cookies
Mint Oreo Truffles
Cranberry and White Chocolate Macarons
2. Gather your supplies

First you’ll need to find a sturdy box with dividers to hold everything. I ordered mine off Amazon but you can always DIY. Your box should be food safe, but I would still recommend wrapping or layering some natural parchment paper below your cookies. You will also want things like ribbon and twine to tie some of the cookies together to give them more of a festive look.
3. Bake and decorate


Baking all your treats is a crucial step, for obvious reasons. You don’t want your cookies to be too soft that they don’t hold their shape when stacked, but you also don’t want them to be overdone and crumble. Check your cookies throughout, and remember they will continue baking afterwards as they’re left on the pan. Be sure to let them cool completely or overnight. If you plan to glaze any of your cookies, be sure to do a very thin layer and give yourself enough time so they can dry thoroughly. You don’t want to risk the iced cookies sticking together if stacked.
4. The fun part: putting it all together

This is your chance to get creative and into the holiday spirit! Once everything is baked, cookies are decorated, and supplies are gathered, it is time to assemble. This is my favorite part because once everything is done, you get to make it look presentable and beautiful for the person you plan to give it to. Feel free to sprinkle in some holiday candies like Christmas colored gumdrops, nonpareils, red and green M&Ms, or anything your heart desires...the sky is the limit here!